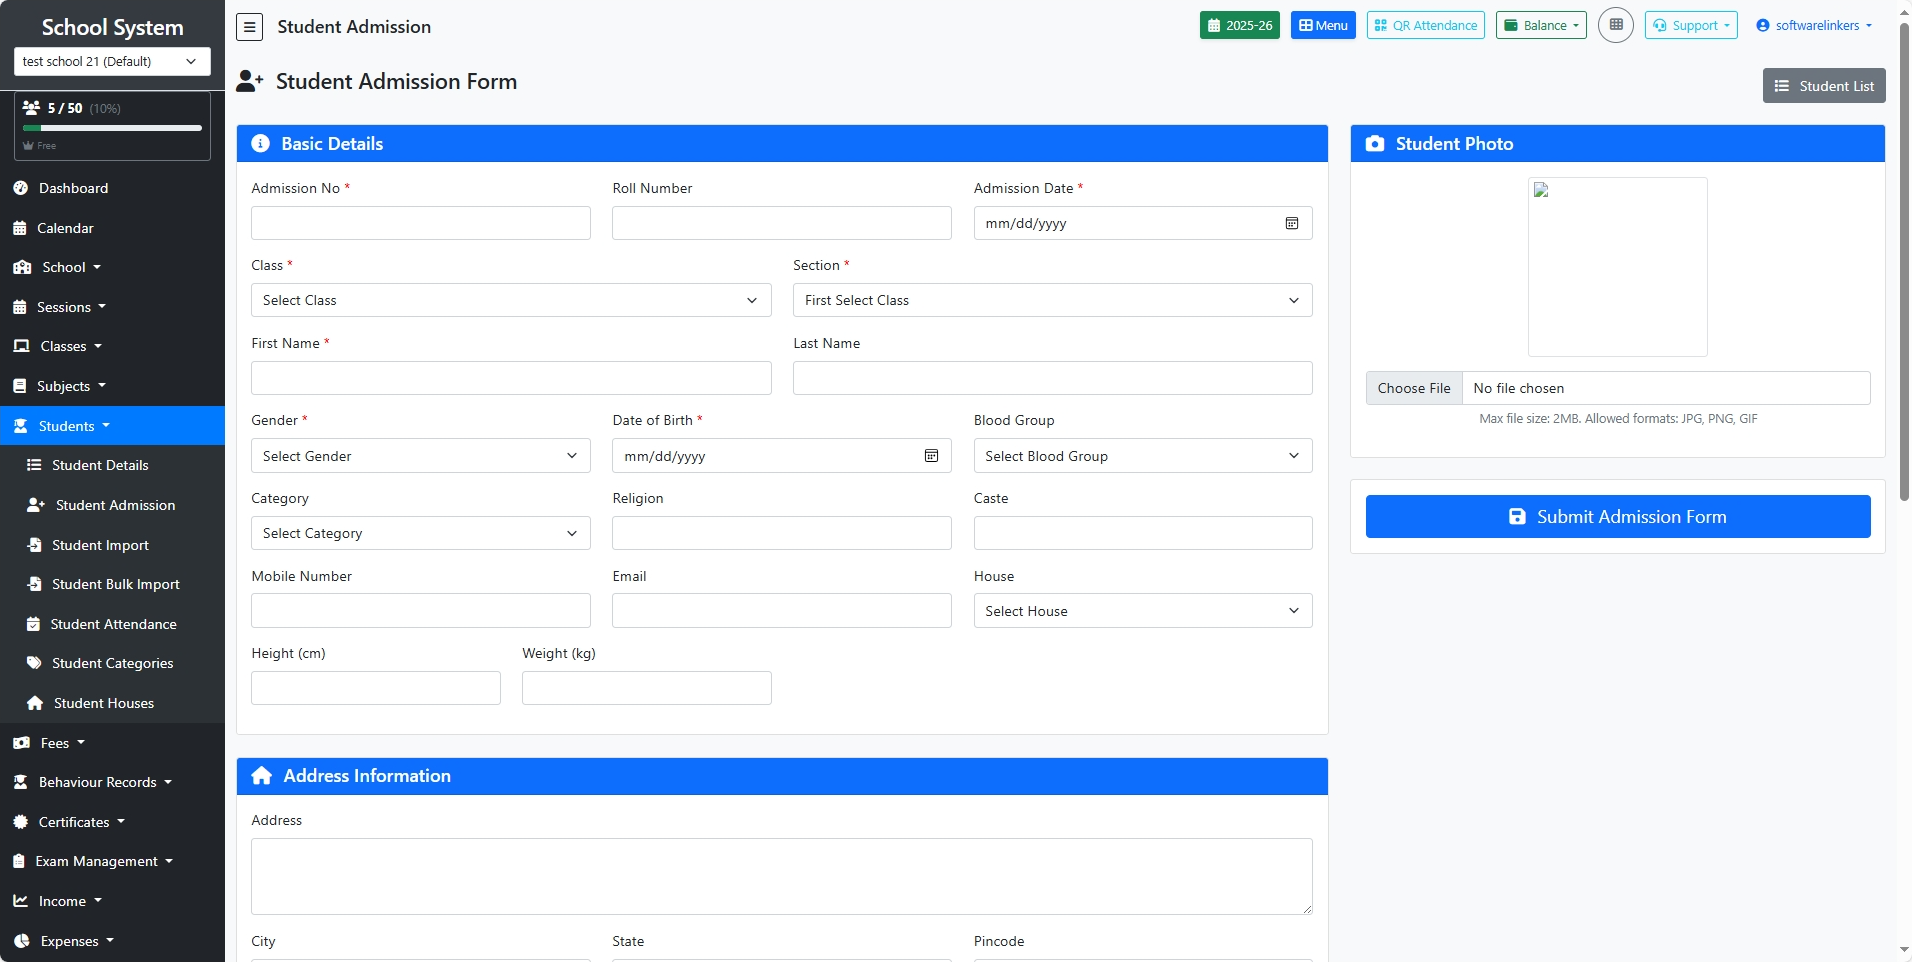
🔹 Section 1: Basic Details
-
Admission No (Required)
-
A unique admission number for the student.
-
-
Roll Number
-
The student’s roll number (optional at admission stage, can be assigned later).
-
-
Admission Date (Required)
-
Select the date of admission.
-
-
Class & Section (Required)
-
Choose the class and section where the student will be admitted.
-
-
Student Name (Required)
-
Enter First Name and Last Name.
-
-
Gender
-
Select the student’s gender.
-
-
Date of Birth
-
Provide the student’s date of birth.
-
-
Blood Group
-
Choose from available options (e.g., A+, B-, O+).
-
-
Category / Caste / Religion
-
Enter student’s category (e.g., General, SC, ST, OBC), caste, and religion if applicable.
-
-
House
-
Assign a school house (if applicable, e.g., Red, Blue).
-
-
Parent Contact Email
-
Enter the student’s or parent’s email address.
-
-
Height & Weight
-
Provide physical details if required.
-
🔹 Section 2: Address Information
-
Address – Full residential address of the student.
-
City, State, Pincode – Enter correct location details for records and communication.
🔹 Section 3: Parent/Guardian Information
-
Father’s Name, Phone, Occupation
-
Mother’s Name, Phone, Occupation
-
Guardian’s Name, Relation, Phone, Email, Occupation, Address
👉 Guardian details are especially important if the student lives with someone other than parents.
🔹 Section 4: Student Photo
-
Upload the student’s recent passport-size photo.
-
Allowed formats: JPG, PNG, GIF
-
Maximum file size: 2 MB
🔹 Final Step: Submit Form
-
Once all details are filled, click Submit Admission Form (bottom-right).
-
The student will now be added to the system and appear in the Student List.